1. Open System Preferences
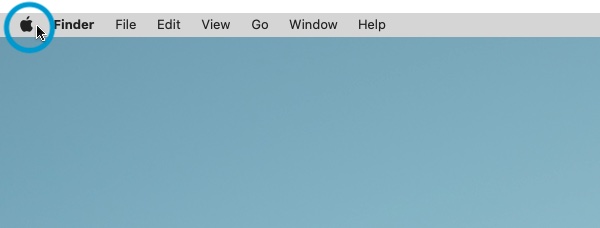
Start by clicking the Apple menu icon in the top left-hand corner of your screen.
The system menu will appear, click the "System Preferences..." item.
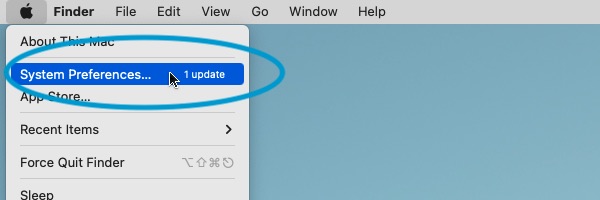
This starts the System Preferences application.
2. Click on the Software Update icon
On the System Preferences window that has just opened, find and click the Software Update icon.

3. Find and activate the Safari update
The Software Update system will show you all of the updates which are available to you.
In our example screenshot below, you will see that we have an update available to our copy of macOS Monterey, as well as an update for Safari. You will see different options on your system, depending on what is available to you.
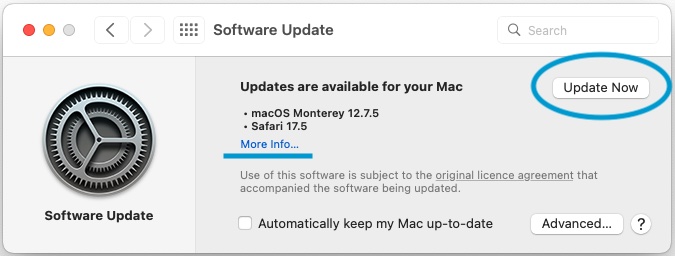
If you click the Update Now button, macOS will install all of the available updates in one go. Note that in some cases this may also require you to restart your computer.
If you only want to install an update to Safari, you will need to click the More info... text, which will then give you a choice of which updates to install.
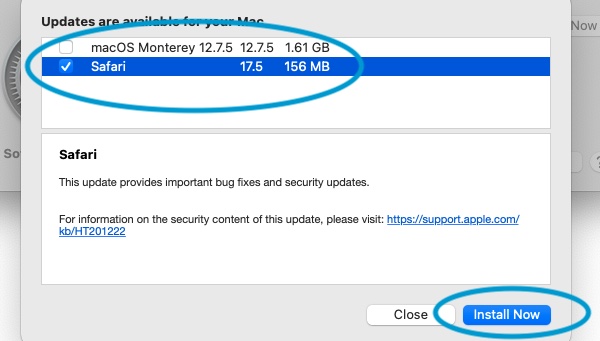
Tick and un-tick the checkboxes to control which updates will be installed.
It is generally a good idea to install all of the available updates, but be aware: this may change how some of your software functions in the future. You should always have a backup of your system before you install System Updates.
4. macOS will now update Safari
The latest version of Safari available for your system will download and install itself. This may take a few minutes depending on the speed of your internet connection.
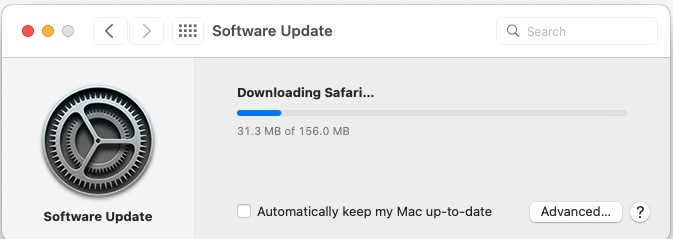
You can see the blue progress bar showing how much of the installation has occured.
5. Safari is now up to date
macOS will have applied the software update to Safari, and you will now have the latest version. Confirm this by using our page to check if your web browser is up to date.
(Source: https://www.whatismybrowser.com/guides/how-to-update-your-browser/safari)